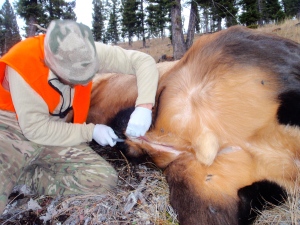
Hunting has taken me to some of the most beautiful moments in my life. It also brings with it the necessity of a spirit unwavered by less than beautiful tasks. I love the diversity of this passion. After a hunt that ends with quarry on the ground, a new set of skills is needed as the next phase of the hunt commences. Knowing how to efficiently and effectively field dress a large animal is a necessity. Here is a description of how we do it. This technique is a tested one from years of trial and error. When the thrill and awe of the hunt has been allowed to sink in, the tag has been notched and memory enhancing photos been taken, it is time to begin.
Start by getting out your equipment. Having everything you need out before you start helps to prevent the dirty task later on of digging around in your clean and organized pack with bloody hands. I use a scalpel, Gerber E-Z Zip, long gloves, cord or string and (if I have one) a buddy. Once I have my gear all ready, I usually survey the area and try to get the animal turned to where the opening I make in his belly will be facing downhill. This helps to keep the animal clean and facilitate removing the heavy and cumbersome organs.
Once the animal is positioned, my buddy will take ahold of the hind leg that is on the uphill side and prop it open so that it is easier to get to the belly. If you don’t have a buddy you can try to prop the leg on a tree or bush. If all else fails I simply prop the leg on my shoulder and work from there. I take my scalpel and make a shallow cut in the center of the pelvic area.
Then using my Gerber E-Z Zip, I slice from that cut all the way up to the sternum.
I only make the first cut through the skin and not through the underlying membrane that holds the guts in place. After making that initial cut I then take the scalpel and cut another small hole to again insert my Gerber into and in a quick motion I open up the membrane to the sternum as well. Take extreme care to prevent perforating the stomach, intestinal walls or bladder.
Now that the cavity is open I can carefully take my scalpel and begin to cut the muscular tissue that holds the organs in the ribcage. Start down by the pelvis and work your way up into the chest. All of this layer has to be cut in order to pull out the organs. This runs along the spine as well. Most of the time you cannot see your knife and it is easy to accidentally cut yourself. In order to prevent this I place my pointer finger on top of the tip of my scalpel blade. Then I know that wherever my finger is that is where my blade is also. This also makes it easier to cut when I cannot see. I simply point my finger at what I am attempting to free and slice it. Be careful not to puncture the bladder. Carefully cut the connective tissue of the urinary tract and lay this outside of the cavity without letting it drain out into your animal.
The lower abdomen is also separated from the chest cavity where the heart and lungs are by muscular tissue as well. This must be cut and the closer to the rib cage you cut it the cleaner the inside of your animal will be once you are finished. After you have cut all the membranes away and removed the bladder you are ready to cut the esophagus. This is where the extra long gloves really come in handy if you want to protect your clothes from the blood or you are concerned about diseases, since you will be inside the cavity up to your shoulder. Again I place my fingertip on the upper part of my blade and reach inside the cavity all the way up to the base of the throat. You can feel the esophagus with your hands. It is very ridged and tough like a hose. I slice this in half and then I am able to put my two fingers from my other hand into the hole of the esophagus and start to pull it down and out. As I do this I am able to slice away any remaining attached pieces of membrane to free the organs. Pull everything down and out until it is all outside of the cavity and free except for the rectum.
At this point I take a piece of the string or cord and tie off the colon near the rectum. Then you can cut it to free the guts completely.
Roll them out of your way. Next I take a knife and run it in a wide circle around the anus from the inside and out. This completely frees the undesired portion so you can remove it. Now your game animal is effectively cooling and ready for transport out of the field. You are one large step closer to the frying pan.


DAYUM! I was scrolling through pictures of mason jar soap dispensers and doily hats when BAM! There’s a dead deer. This is a whole other level of DIY, but it’s super interesting. People should know where their meat comes from!
LikeLiked by 1 person
Thank you! I love knowing that my meat is 100% organic, lean and that it was taken excellent care of in every stage of processing.
LikeLike
It’s great that you are covering this. A lot of people get overwhelmed their first time and this spells it out and shows how easy it really is!
LikeLiked by 1 person
Thank you! It was actually a difficult one to write but I knew it could be helpful so figured I would go for it!
LikeLike